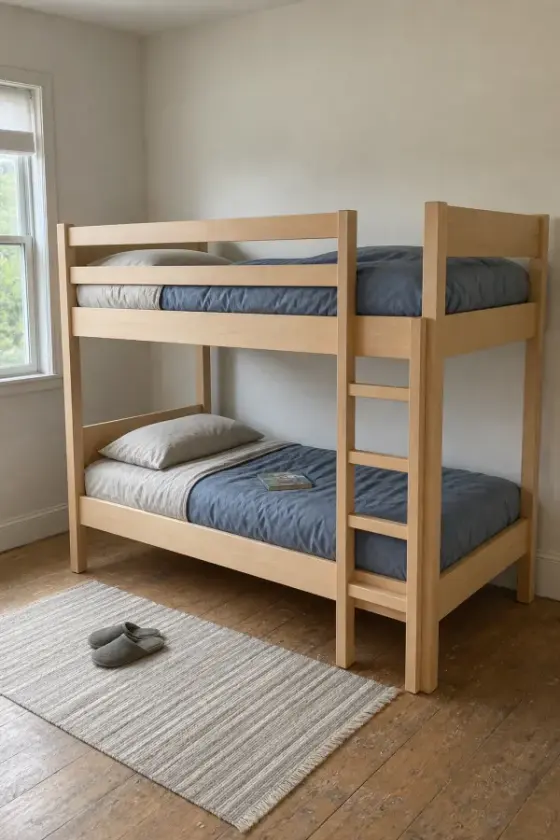
What you’ll build
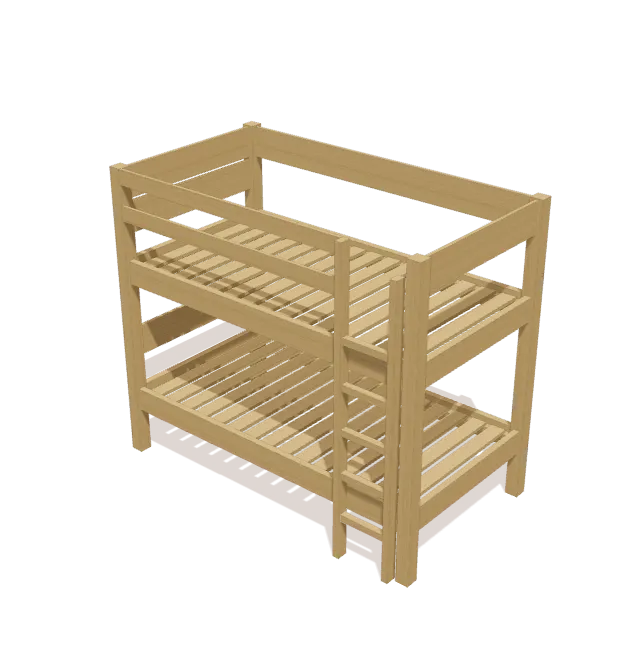
The bed takes two standard twin mattresses (38″ × 75″). Each end frame is two posts joined by 2x6 end rails, with three 1x8 headboard boards on one end and one on the other. Four 75″ 2x6 side rails connect the ends, 2x2 cleats on the rails carry fifteen 1x4 slats per bunk, and a 2x3 ladder with five 2x2 rungs, a 1x4 front guardrail, and a 1x8 rear board finish the top bunk.
Shopping list
Buy these boards. The list fits every cut onto standard lengths and leaves ⅛″ for each saw cut and ¼″ for trimming board ends.
| Lumber | Length | Qty |
|---|---|---|
| 2x6 | 8 ft | 6 |
| 1x8 | 8 ft | 3 |
| 1x4 | 8 ft | 17 |
| 2x2 | 8 ft | 5 |
| 2x3 | 8 ft | 2 |
| 3x3 post | Cut to length | 4 |
Cut list
Every part, grouped so you can cut matching pieces together. Sizes are actual dimensions (a 1x4 is ¾″ × 3½″). Check them against your own boards before cutting.
| Part | Lumber | Section | Length | Qty | End cut |
|---|---|---|---|---|---|
| Slat | 1x4 | ¾″ × 3 ½″ | 38″ | 30 | Square |
| Front Ladder Rung | 2x2 | 1 ½″ × 1 ½″ | 11″ | 5 | Square |
| Post | 3x3 post* | 3″ × 3″ | 70″ | 4 | Square |
| Side Rail | 2x6 | 1 ½″ × 5 ½″ | 75″ | 4 | Square |
| End Rail | 2x6 | 1 ½″ × 5 ½″ | 38″ | 4 | Square |
| Headboard | 1x8 | ¾″ × 7 ¼″ | 38″ | 4 | Square |
| Mattress Support Cleat | 2x2 | 1 ½″ × 1 ½″ | 75″ | 4 | Square |
| Upper Front Guardrail | 1x4 | ¾″ × 3 ½″ | 60 ¼″ | 2 | Square |
| Front Left Ladder Stile | 2x3 | 1 ½″ × 2 ½″ | 70″ | 1 | Square |
| Front Right Ladder Stile | 2x3 | 1 ½″ × 2 ½″ | 66″ | 1 | Square |
| Upper Rear Headboard | 1x8 | ¾″ × 7 ¼″ | 75″ | 1 | Square |
* Planned at the section shown, which is larger than this lumber’s standard size. Buy stock at least that size or adjust the plan in the app.
Tools
- Tape measure
- Pencil
- Speed square
- Eye & ear protection
- Drill
- Miter saw
- Clamps
- Sander
Step-by-step instructions
Assemble Left End Frame
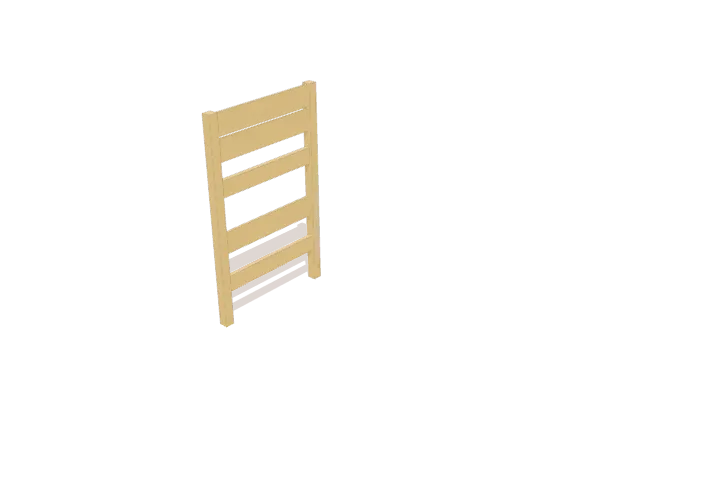
Lay the two 70-inch left corner posts flat on your work surface. Align the lower and upper 38-inch end rails and the three 1x8 headboard planks between the posts, keeping the outer faces flush. Clamp the assembly firmly before standing.
Assemble Right End Frame
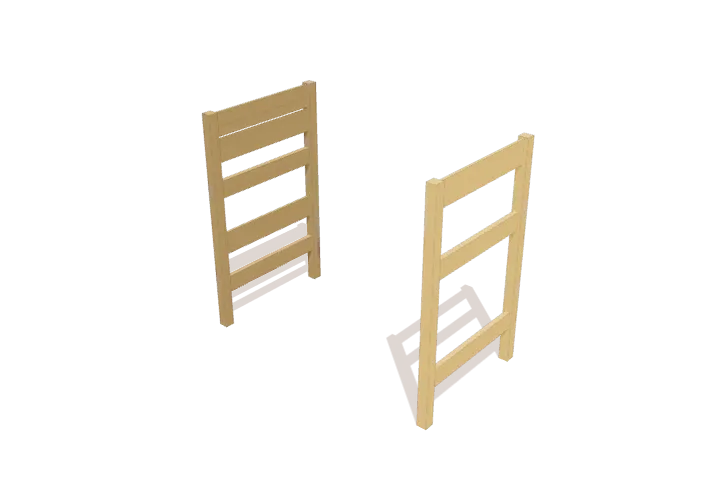
Lay the two 70-inch right corner posts flat on your work surface. Fit the lower and upper 38-inch end rails and the 1x8 top anti-fall board between the posts, aligning all outer faces flush. Clamp the frame tight and square.
Connect Main Side Rails
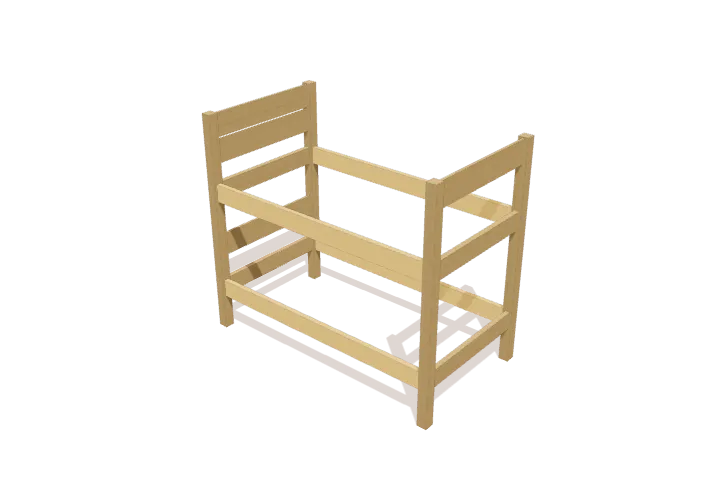
Stand both end frames upright with a helper and bridge them with the four 75-inch 2x6 side rails. Position the rails flush between the corner posts at the lower and upper tiers, clamping each corner tight.
Attach Mattress Support Cleats
Position the four 75-inch 2x2 mattress cleats along the inside faces of the lower and upper side rails. Align them flush with the bottom edge of each rail to create level slat ledgers.
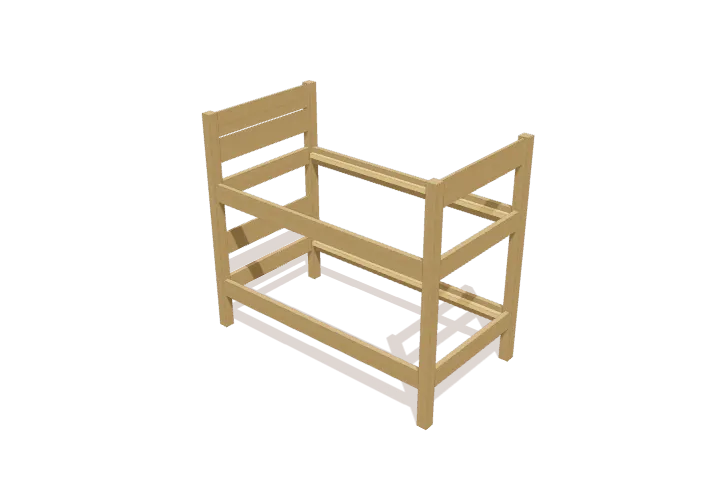
Place Lower Bed Slats
Set the fifteen 38-inch lower 1x4 slats crosswise onto the lower support cleats. Space the slats evenly across the bed length, resting their ends flat against the front and back ledgers.
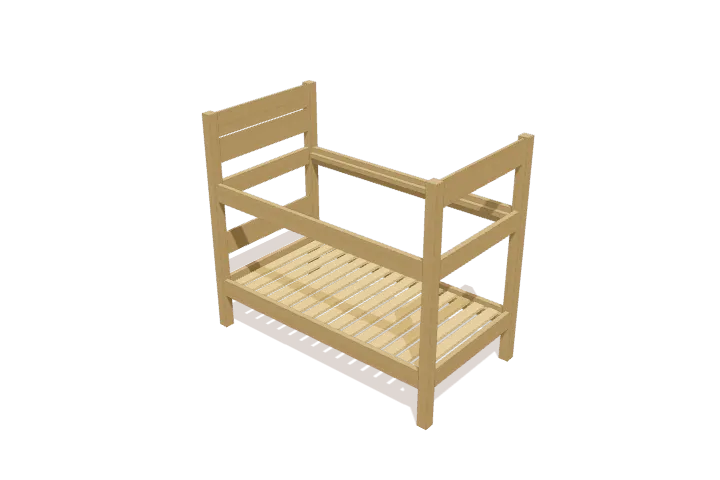
Place Upper Bed Slats
Lay the fifteen 38-inch upper 1x4 slats crosswise onto the upper mattress cleats. Distribute them with uniform spacing from end to end, ensuring both ends rest fully on the ledgers.
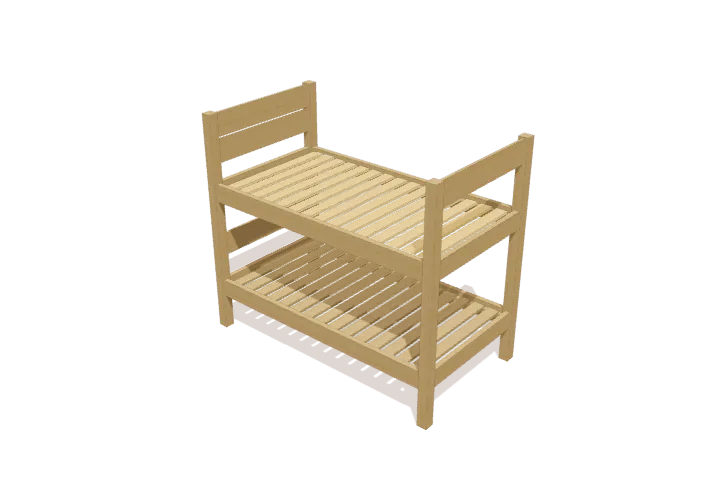
Assemble Front Ladder
Place the 70-inch and 66-inch 2x3 ladder stiles flat on your workbench. Align the five 11-inch 2x2 rungs horizontally between the stiles at their layout marks, then clamp the ladder frame square.
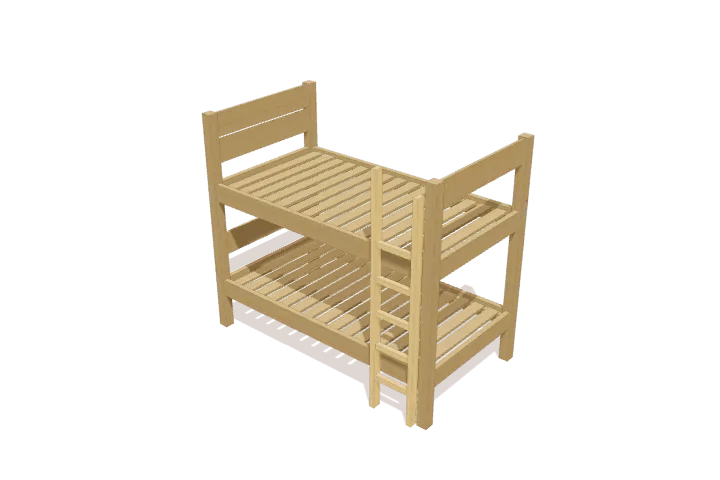
Install Guardrails and Rear Board
Position the assembled ladder flat against the front side rails. Align the two 60-inch front guardrails between the front-left post and the left ladder stile, then fit the 75-inch rear anti-fall board across the upper back posts.
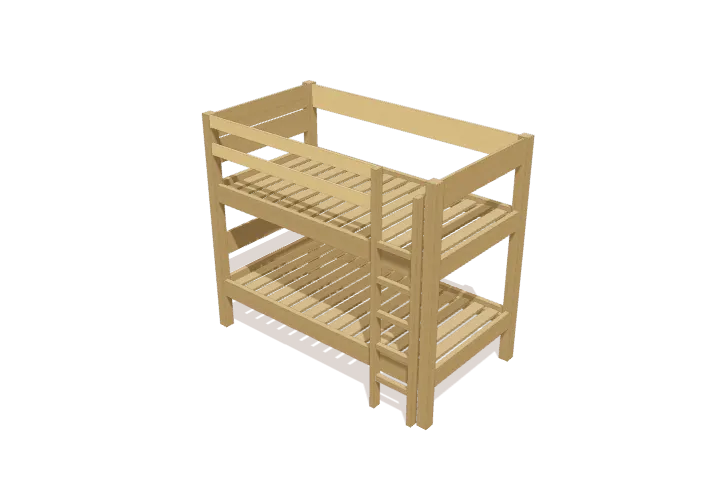
Bunk beds carry a real fall and entrapment risk. In the US, bunk beds sold for children must meet the CPSC bunk bed standard (16 CFR 1213 and 1513), which covers guardrails on both sides of the upper bunk, guardrail height above the mattress, and the size of any openings. Check your build against those rules, use the mattress thickness the guardrails were sized for, and keep children under 6 off the top bunk.
Change the size or design
This plan is one of the projects in the TimberLab app’s catalog. In the app you can turn the model in 3D, follow the assembly steps one part at a time, and ask for changes in plain words, such as “make it 6 inches shorter” or “add a shelf”. The cut list and shopping list update to match the new design.
Questions about this plan
How much lumber do I need to build this simple bunk bed?
The shopping list calls for 6 × 2x6 at 8 ft; 3 × 1x8 at 8 ft; 17 × 1x4 at 8 ft; 5 × 2x2 at 8 ft; 2 × 2x3 at 8 ft; 4 × 3x3 post (cut to length). It groups every cut onto standard board lengths and leaves room for saw cuts and trimming the board ends.
How big is the finished simple bunk bed?
It is 81″ wide, 70″ tall, and 45 ¾″ deep.
What tools do I need?
You need a tape measure, pencil, speed square, eye & ear protection, drill, miter saw, clamps, sander.
Can I change the size of this simple bunk bed?
Yes. Open the simple bunk bed in the TimberLab app and describe the change in plain words, such as “make it 6 inches shorter”. The 3D model, cut list, and shopping list update together.